White trim is not new to the style scene and in fact we think it is only picking up steam. For the last year almost every new-construction project No Drip Painting has been a part of the client has chosen a variation of white or light gray for their interior woodwork. Now, most of us are not in a position to be building our new, custom dream home so we have to figure out how to update what we have. NDP is currently in the midst of several projects where homeowners are wanting to change their old, dark, stained woodwork to something much brighter in appearance. So you might be left asking, how do I achieve that high-end, crisp and shiny woodwork with what I already have? We are here to answer that question. We will take you through our preferred method for painting woodwork in an existing (and fully furnished) home.
The Decision is Made: Paint the Woodwork
Go ahead and let out that big sigh of relief; you made the decision to paint your woodwork, congratulations! No more contemplation, no more wood-painting guilt, just go for it-we know you will love it!
Now that you can breathe and you have decided to embark on this awesome journey towards freshened up woodwork, go ahead and grab yourself a big dose of patience. This transformation requires serious patience, attention to detail, respect for the time needed, and a dedication to following the process. Let’s get started.
Prime Coat
To answer your first thought, you prime before you prep? Yes! We will explain why in a minute.
Not all primers are created equal. It is critically important to choose a good bonding primer, especially when painting over any surface that has previously been clear coated or sealed with polyurethane. Bonding primers are intentionally designed with capabilities to adhere to slick and shiny surfaces. If you fail to use a product with the necessary adhesion qualities you will immediately see your primer pulling away from the surface, creating bubbles or sliding off your surface.
Our go-to bonding primer is: SW Extreme Bond Primer.
NOTE: If you are going to be painting your woodwork a color other than white, go ahead and get your primer tinted to the same color. This will only enhance the coverage once you begin applying your finish coats.
Prep: Do it Right the First Time
We know, prep usually comes first, but here is why that is not the case in this particular process. When stained woodwork is initially installed the nail holes are generally left unfilled, this can cause for a very time consuming project when trying to quickly locate and fill all the holes. If you apply your primer first it is then much easier to come back and quickly spot nail holes and scratches and get them filled appropriately.
If there is one thing you remember throughout this process it has to be-do it right the first time! This prep process is not difficult, but it requires sufficient time to complete steps thoroughly and patience to allow for full dry times. Once you fill all of of your nail holes with lightweight spackling, let them dry completely; depending on temperature, humidity and the amount of product used, dry time could take up to a full day. Once everything is dry, grab yourself a low grit sandpaper or sanding sponge and lightly sand all nail holes until smooth. (Do no skimp on your sanding! You will see every uneven spot in your finished project!)
Caulk
It would be very common for your previously stained woodwork to have never seen caulking before. (This is typically the case for both window/door casing, as well as baseboard). You will want to take the time to caulk the seam between these surfaces and your wall before you start applying your finish coats of paint.
NOTE: If you are painting this woodwork as part of a whole room makeover (i.e you are also going to be painting the walls) hold off on your caulking and move on to the next step. If you are painting your walls we will talk you through a ‘backfill’ process with your caulking a little later on that will help create a crisp cut line and eliminate the risk of paint ‘bleed’ from your wall color.
Finish Coats
The time has come that you will now need a brush you feel confident with (perhaps a 2.5 or 3 inch angled brush) and you will finally get to see the fruits of your labor. The application of these coats is where you see the color transformation come to life. It is standard process at NDP to apply two finish coats of paint to woodwork and we would recommend the same for you. We use only a high quality paint that provides extreme durability and washability for these types of projects, such as Sherwin Williams Emerald Urethane. Emerald Urethane is a wonderful new project that has added ‘urethane’ components that support a hard and long-lasting coating once fully cured.
NOTE: If you are a bit hesitant of your painting ability-go ahead and give yourself a safety net. If you are painting over hardwood floors, you can certainly tape down some lightweight paper in case a brush stroke dives a little too close to the floor. If you are painting against a carpeted floor, consider using a large drywall knife (sometimes referred to as a ‘mud’ knife) to stick between the carpet and trim as you paint. It is important to remember if you are using the knife method that each time you pull your knife out and move it along the trim, it needs to be wiped clean of any wet paint.
Almost Finished!
If you are going for the grand finale of also painting your walls, it is now time to backfill with caulk and finish up your painting. You need to be 100% sure before you start this step that your freshly painted woodwork is absolutely dry. Waiting 24 hours after applying your final top coat will probably be sufficient, waiting 48 hours would be even more ideal. This dry time is necessary for all paint, but especially for the urethane paint we discussed earlier. It is essential to allow time for complete curing to happen in order for the product to produce it’s optimal hardness.
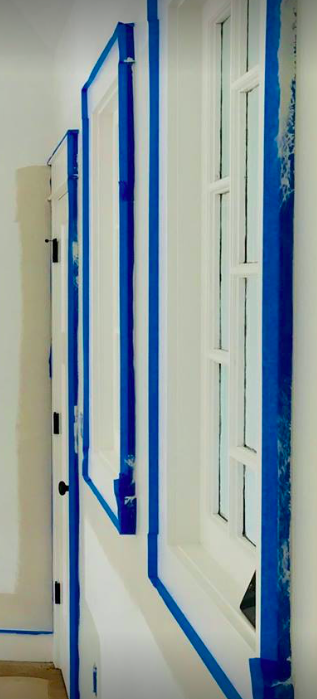
Once you are confident in the dry woodwork you need to tape it off. Run pieces of painter’s tape across the edge of the surface and ensure good adhesion to the woodwork. Your next step is to caulk, we call this backfilling. You caulk just as you would any other time-smooth, even and consistent across the whole length of trim. This layer of caulk will end up painted your wall color and provide a straight cut line in addition to eliminating paint from being able to bleed underneath the tape to your new woodwork.
Let your caulking dry before painting and then let your paint dry (completely) before removing your tape.
Now, take a step back and admire what you have done. By following these few, simple steps you will be able to watch your old woodwork morph into the fresh, modern trend taking over home decor.
Happy Painting!