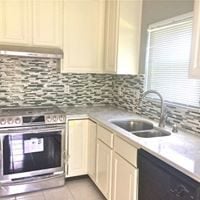
The 1990’s brought a whole new look to our family kitchens–what was once considered ‘modern’ still stands in many kitchens in 2018. If you are looking to once again update your kitchen cabinets, but you don’t want (or need) to go to the extent of replacing them-give painting a try. In a few simple steps you can completely transform the feel of your space and give your cabinets a second life.
Remember that old saying-patience is a virtue? This would be a good time to apply that message. Painting your cabinets is not a difficult process, but there are several steps and they all deserve adequate time and patience.
Step 1: Remove Doors and Hardware
Grab yourself a drill and remove all doors, hinges and hardware from your cabinets. This is a great time to assess whether or not the same hinges and hardware will be going back on or if it is time to update those as well. Depending on the size of your kitchen and the number of cabinets you are dealing with, go ahead and use painters tape to label your doors as you pull them off. Use numbers or letters, whatever makes sense to you-just remember the order you went in.
Step 2: De-gloss and Sand
This step is essential to prepare the wood surface for paint and primer applications, and does the heavy lifting in removing those years of grease and grime. In a one step process you simply wipe on the water based de-glosser and reap the benefits for many more steps to come! Once you have completed all doors, drawers and cabinet frames, take a light grit sand paper and do a once over to knock off any debris and even out the surface.
Tip: You could also clean your cabinets with Trisodium Phosphate (TSP). Being a harsh, water-soluble product excellent at de-greasing, please wear gloves when applying. This can be purchased at stores such as Home Depot and most specialty paint stores.
Product Suggestion: Sherwin Williams M-1 Deglosser and Pre-Paint Cleaner
Step 3: Apply Bonding Primer
The explanation for this step might be right in the name. Bonding primer acts as your adhesion layer and allows your top coat to seal appropriately to the wood. Make sure you are using a brush and roller combination as you apply paint/primer to ensure even and streak-free application.
Tip: If you are going dark, bold or vibrant with your finish coat, get your bonding primer tinted a similar color. Why make covering up primer harder than it has to be?
Tip: This is not the place for a nappy roller. You want light, even coverage on each layer, your roller does not need to hold excess paint.
Product Suggestion: Sherwin Williams Extreme Bond Primer
Step 4: Caulk and Sand
Oak is a wood that naturally shows it’s wide grain (even after painting-don’t think you will make this go away when painting) so much of our work is to eliminate the other cracks and seams along the way. In order to do this you will want to caulk the inset face of your doors and any seams in between your cabinet frames. Once your caulk has cured, complete another light sanding across your doors and cabinet frames.
Step 5: Finish Coats
You have been patient, diligent and detailed for steps 1-4, now it is time to be rewarded! Get your brush and roller ready and watch as your finish coats transform those dated cabinets. Be sure to allow complete drying time in between your coats and check to see if an additional round of sanding is needed in between. You will likely need two finish coats to complete your project.
Tip: You could get away with a Satin finish if you really wanted, but we recommend Semi Gloss on cabinets. This provides a durable and easy-to-wipe surface.
Product Suggestion: Sherwin Williams ProClassic Waterborne Interior Acrylic Enamel
The last step is to reapply your hardware and hang your doors. When it is all said and done, take a step back, pat yourself on the shoulder and rest easy knowing that your cabinets are now in-style and worry free for years to come.
Happy Painting!